Monday, June 23, 2008

Raspberry Fields


http://blueberryhillkennel.com/raspberries.gif

The Raspberry Room

by Karin Gottstall

It was solid hedge, loops of bramble and thorny
as it had to be with its berries thick as bumblebees.
It drew blood just to get there, but I was queen
of that place, at ten, though the berries shook like fists
in the wind, daring anyone to come in. I was trying
so hard to love this world—real rooms too big and full
of worry to comfortably inhabit—but believing I was born
to live in that cloistered green bower: the raspberry patch
in the back acre of my grandparents' orchard. I was cross—
stitched and beaded by its fat, dollmaker's needles. The effort
of sliding under the heavy, spiked tangles that tore
my clothes and smeared me with juice was rewarded
with space, wholly mine, a kind of room out of
the crush of the bushes with a canopy of raspberry
dagger—leaves and a syrup of sun and birdsong.
Hours would pass in the loud buzz of it, blood
made it mine—the adventure of that red sting singing
down my calves, the place the scratches brought me to:
just space enough for a girl to lie down.

From poems, to songs, Prince's Raspberry Beret, and those famous raspberry fields. And don't forget raspberry tea, and raspberry tarts. Every year, as surely as spring follows winter, the end of school is closely followed by the advent of canning season. First comes raspberry jam. From ripe, firm berries, to full jars, glistening like jewels on my kitchen counter. There is something eminently satisfying to ending the day to rows and rows of jam that you have produced for the coming year.
Raspberry Jam Swirl

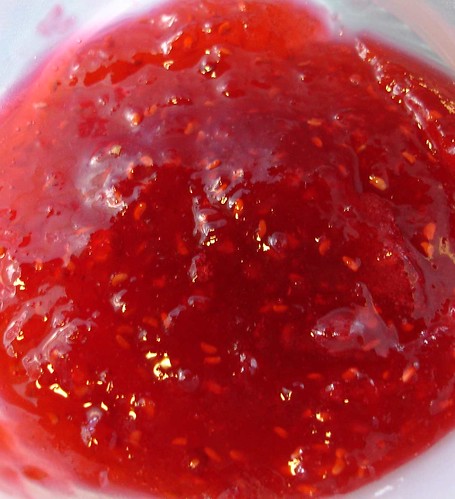
Of course, then I had to make bread!

Thursday, June 19, 2008

Book Envy and Mother Cover!!

All this week I have been reveling with the book people at BYU's writing for Young Reader's conference. It has been great! Rick Walton, Brandon Sorensen, Claudia Mills, A.E. Cannon, and Jeannette Ingold. This is my favorite so far of Jeannette's books. Mountain Solo is about a violinist whose world is shaken when she fails at the one thing she is good at. Read it, you won't regret it.

If you love music, you have to read it!
Tomorrow is the last day of the conference, (sniff) so I'll be back to craftiness soon, but in the meantime check out this great website by my sister. She just had a baby, and needed something a little cuter than an old receiving blanket to help her be modest while nursing her sweet little boy. These nursing covers are ingenious, allowing you to see the baby, while still remaining totally covered. And they are Cute! Check it out!

Saturday, June 14, 2008

Aprons Swapped


Today I got a lovely surprise in the mail, this apron from the Feathered Nest Apron swap. I had seen the picture of it on the flickr photo postings, and secretly lusted after it. (sad isn't it. Secret lust after an apron) My swap partner is awesome!!
It is embellished with black velvet ribbon trim, and lovely ric rac for a vintage feel. I was actually wearing a red top and black pants when I pulled it out of the box, so I put it right on! Thanks Jen!She also sent me a copy of A is for apron. This is an incredible book. It makes the apron feel so new and trendy. I look forward to putting one on. (and suffice it to say, I need one. I am a terrible mess in the kitchen!)

Wednesday, June 11, 2008

Cheesecake to die for!


Last week I had a wedding cake for a high school friend of my sisters.

This is not the most traditional of wedding cakes!
But in my humble opinion it is one of the best. The flavor is outstanding, and the guests cluster around the table, just waiting for the moment when the bride and groom will slice into the creamy goodness of new york cheesecake, and tart sweetness of the glazed strawberries, all surrounded by a smooth cream icing.

Cheesecake can come in many different shapes and sizes, bars, rounds, pops, wedges, but they are all good. Below is one of my favorite recipes for cheesecake bars. This recipe IS different from what I use for wedding cakes, and I wouldn't recommend it for this purpose, because it is almost TOO creamy. But it will wow your friends and neighbors at barbecues or family get togethers.
Prep Time:
15 min
Total Time:
5 hr 5 min
Makes:
16 servings, one piece each
1-1/2 cups Graham Cracker Crumbs, or pecan sandies (My Favorite)
1/4 cup (1/2 stick) butter, melted
1-1/4 cups sugar, divided
4 pkg. (8 oz. each) Cream Cheese, softened
2 tsp. vanilla, divided
1 container (16 oz.) Sour Cream, divided
4 eggs
2 cups strawberries, sliced
1/2 tsp. lemon juice

PREHEAT oven to 325°F. Line 13x9-inch baking pan with foil, with ends of foil extending over sides of pan. Mix crumbs, butter and 2 Tbsp. of the sugar; press firmly onto bottom of prepared pan.

BEAT cream cheese, 1 cup of the remaining sugar and 1 tsp. of the vanilla and lemon juice in large bowl with electric mixer on medium speed until well blended. Add 1 cup of the sour cream; mix well. Add eggs, one at a time, beating on low speed after each addition just until blended. Pour over crust.

BAKE 40 min. or until center is almost set. Mix remaining sour cream, 2 Tbsp. sugar and 1 tsp. vanilla until well blended; carefully spread over cheesecake. Bake an additional 10 min. Cool. Cover; refrigerate 4 hours or overnight. Lift cheesecake from pan, using foil handles. Top with strawberries just before serving. Store leftover cheesecake in refrigerator.

To make the presentation even more spectacular glaze the strawberries. Crush about 1 cup strawberries, add 1/2 c sugar. Cook over medium heat, add 2 T cornstarch dissolved in a little water. Cook until thick. Let cool, and brush over berries on cheesecake.

Enjoy!!!

Monday, June 9, 2008

Done at last!!

The Apron I made for the apron swap over at a Feathered Nest is finally done. I am trying to eliminate some of my fabric stash, so here is some of what I pulled out to use.I used this super helpful tutorial, HERE.
The apron is simple, but I decided to make it more Barrista length, so I added two inches onto the length.

This is my lovely sister modeling for me. She liked the apron so much I may have to make her one. The waistband was easy, but a great step by step for it is found HERE, from lululollylegs.
Finally I added a pocket. I love ruffles, but don't want it to be too girly, so just a touch was perfect.
And here it is. Finished, ready to send out to CAT, my swap partner. I hope she likes it.

Friday, June 6, 2008

Come on In!!! Apartment for rent!


Take a Tour!


Our most recent tenants are leaving, so the basement apartment is up for rent again.
Come on in and have a tour!!
This is the entrance to our basement apartment, completely separate, with two parking spaces, and their own locked mailbox. (Small dog is not included in apartment.)
This is the entryway, with a large coat closet on the left, and an included washer and dryer in the closet on the right. (Love the black and white tile)
Then you enter the family room. The light fixture has been changed since this picture was taken, to a classic chrome IKEA fixture, with multiple lights. There are full sized west facing windows that let in a lot of light. These pictures were taken at night.
Next you enter the kitchen, white wood and glass cabinets, black and white tile, fridge, stove, pantry, sink, you get the idea.

Through the kitchen you enter the bedroom. On the opposite wall there are two full sized closets that stretch the entire length of the room. It is large enough for a king sized bed, dresser, chair, ect. Down a short hall are a small desk area, (not shown) and the bathroom. Tub/shower, linen closet, ect.
The apartment is new, well taken care of, and includes satellite television, separate heat, washer/dryer, all utilities except phone, and fabulous neighbors who occasionally deliver fresh bread!:) We live in a great family neighborhood in Orem, only 10 minutes from BYU, (where my husband works). Our first renters liked the neighborhood so much they bought the house two doors down!
Hope you have enjoyed my tour. Come on. Won't you be my neighbor?
,

Monday, June 2, 2008

All Tied Up- Ribbon Wrapped Wedding Cake

This was a fun, flirty wedding cake I was able to do last weekend. Tiffany blue, white and brown are very popular colors for wedding cakes this year. Very sophisticated, and elegant.The criss-crossing ribbons added a touch of whimsey and fun. A border ribbon of chocolate brown finished the edges off simple, and cleanly. The tiny bows draw the attention, almost like a well placed beauty mark.
I loved the table treatment, of interwoven ribbons over a chocolate brown base. You can do this right on the table, but if it is windy you might want to tack the edges down with a bit of thread.

This tiffany blue, ribbon wrapped wedding cake was a perfect example of bringing traditional and non traditional elements together for a surprisingly beautiful, original statement of your own wedding personality.

Flannel Blanket Tutorial

After five years the principal at my kids elementary school is moving on to bigger and better things. (go Michelle) As a thank you for all the incredible things she has done the PTA decided to give her a gift, and I made a flannel rag quilt for her. I love flannel quilts, because they are soft, cuddly, easy to make, and you are not scared of using them. (I still won't use some of my pieced quilts)
*****If you can sew a straight line, you can make this quilt!!!!******
This makes a largish sized quilt, good for a bedspread, camp quilt, or just cuddling up on cold winter nights.
I used 2 yards of gold flannel, 2 yards of blue flannel, and four yards of denim for the back. (anything that frays well works. This quilt was our school colors, but use your imagination and make a funky bright baby quilt, or a pretty pastel.Applique a few of the blocks for a fun touch.)
I also used the thinnest weight bonded batting available.
Using your rotary cutter and mat cut material into ten inch squares. (Other sizes are great too, but for a quilt this big I like the bigger blocks. You can also use different sized blocks, but if you do, don't forget to figure in the seam allowances.)
Cut batting into six inch squares. Any bigger and the batting can show in the seams.

Now for the fun part. Get your kids, roommate, husband, or SO to help stack flannel sandwiches. Place a denim square right side down, then a piece of batting, then a piece of flannel, right side up. You should have a raw edged quilt block. To hold the pieces together, and give it that "quilted" look sew a large X from corner to corner on every block. Do this until you run out of fabric, or go cross eyed.
This quilt was 7 rows of seven blocks. The next step is to sew the blocks into rows. Place backs together, and make sure all raw edges face the same direction. Leave a one inch seam allowance for ample fraying. When the rows are finished, sew together, again making sure raw edges all face out.
Next take a SHARP pair of scissors, and cut into the seam allowance at 1/4 inch intervals. Be careful not to clip through the stitching line. (But if you do, just restitch. Not hard. I promise-I do it every time.) Now for the instant transformation. Wash the quilt and watch the edges make a lovely, fuzzy rag edge that you will just itch to pet.
WARNING: this is very messy. Be prepared to clean out your washer. Some people go to the laundromat, but how sad for the person who comes after you and gets a washer full of threads on their clothes. So just wipe it out with a damp paper towel. Also, a dryer sheet in the washer helps it to stay soft.
Shake the extra thread off, and enjoy.
Here is Michelle with her quilt. We will miss you.